Nautilus file manager is the software of choice for many Linux users who enjoying using GUI apps for directory management. Personally, I like to work with Git via the terminal because I learned to be more efficient in working that way.
The last time we talked about this, I had to use an extension to make it work. This is the reason why I am now happy to tell you that you can also be efficient using the GUI thanks to Nautilus integration capability for Git on the GNOME desktop environment.
This is particularly good news because some users have had to employ third-party apps to achieve the same goals and that no longer has to be the case. What is required to integrate Git with your file manager? Nautilus, a Git account, and sudo privileges.
If you’re using Debian or any of its derivatives but are neither running GNOME nor have nautilus already installed, here’s the command you need:
$ sudo apt-get install nautilus
Next up, integrating Git with Nautilus so that you can work with Mercurial (Hg) and SVN. We will do this by installing the rabbitvcs package for Nautilus.
$ sudo apt-get install rabbitvcs-nautilus -y
On installation complete, restart Nautilus with the command below or simply log out of your user account and back into it again:
$ nautilus -q
Now, let us set up our Git account to work with Nautilus.
Setting Up Git Integration with Nautilus
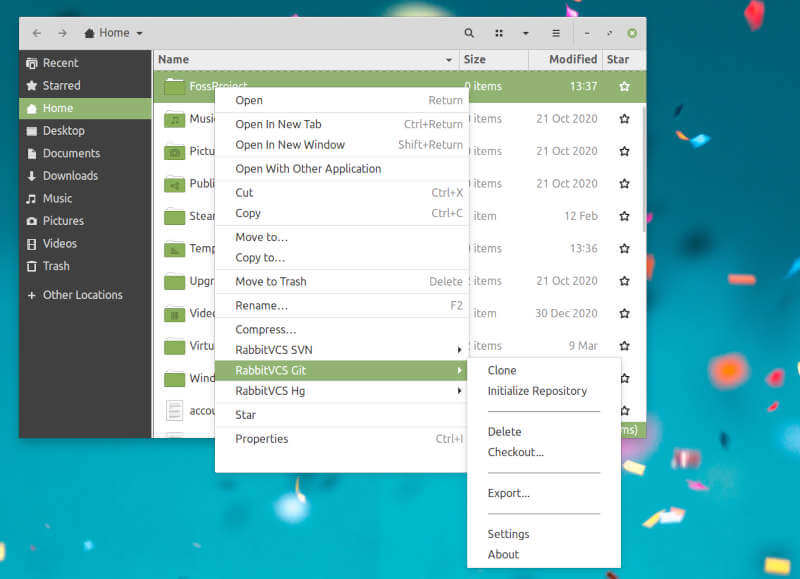
Launch Nautilus file manager, create a new folder under any name e.g. FossProject. Right-click it and select RabbitVCS Git > Initialize Repository.
Next, run the command:
$ nano ~/Templates/touch text_template.txt
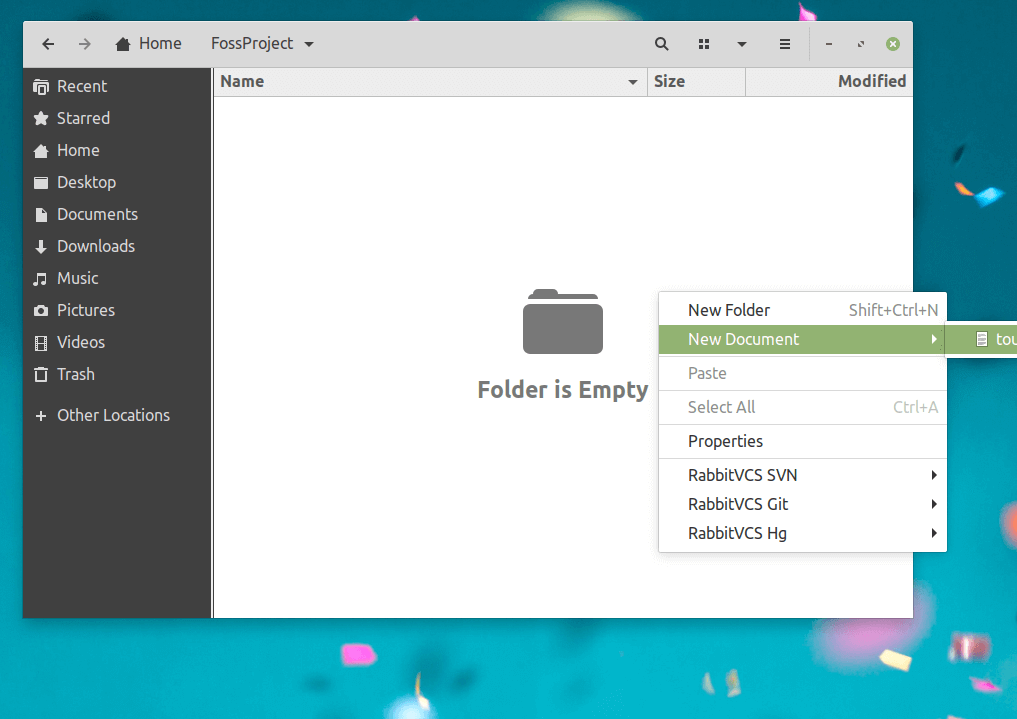
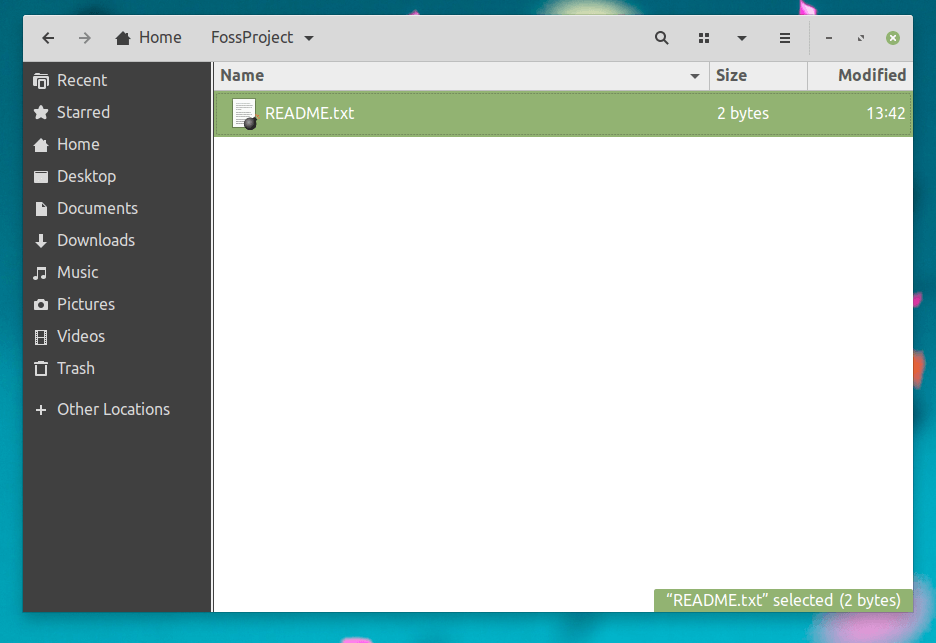
This command creates a template text file after which you will be able to create text files from your Nautilus GUI. From within your FossProject folder, right-click on space and create a new document. Rename it README.txt.
Next, right-click on space again and select RabbitVCS > Commit. When a dialogue prompt appears, enter your commit message and click OK.
Integrate RabbitVCS with GitHub
Now that you’re at this next stage, locate the SSH URL for the GitHub repository that you want to work with. Right-click (on an empty field) and select Update. Paste the repo URL in the Repository field, type master in the branch field to indicate your pointer head, and click OK.
Once that is completed, your local repository should be identical to the remote version. Remember to always update your local directory whenever files are added to the remote branch to make sure that you’re working with the latest files.
So there you have it, folks! No need for you to install any third-party applications or extensions to work on simple projects when you can work with Git directly from your Nautilus file manager.
Now, if you need to execute more complicated tasks then you might need to install GitKraken and no one can sue you to court for that. Are any tips for working with Git with or without third-party apps that you would like to share with us? Feel free to drop your comments in the discussion section below.